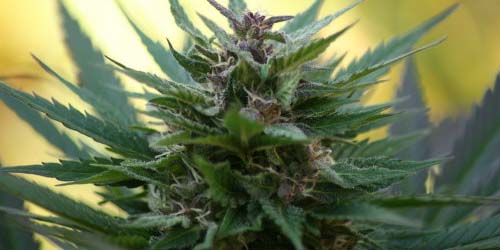
After working hard for weeks, the moment’s finally arrived: you’re ready to harvest your weed plants. It sounds like an easy job but don’t forget: there are many things to consider and they are at least as important as the flowering and growing phases. Harvesting, cutting, drying and storing weed? We’ll tell you how. Read on.
Flowering and Harvesting the Cannabis Plant
If you want to know when you should harvest, it’s vital that you monitor the plant closely during the final weeks of the flowering period. It’s useful to know first when the flowering period comes to an end. You should have been given a good idea about this when you bought the weed seeds. The packaging or included information usually states the length of the plant’s flowering period. We can give you some idea:
Indoor cultivation:
- In the case of indoor cultivation with lights, most feminised weed seeds (Indica or Sativa) have a flowering period of 8 to 12 weeks.
- For Feminised Autoflower weed seeds the flowering period lasts approximately 6 to 8 weeks. The complete growing cycle can last approximately as long as the flowering period for a feminised plant.
Outdoor cultivation:
- Sativa-dominant seeds have a flowering period of approximately 3 to 4 months.
- Hybrid seeds or Indica-dominant types remain in flower for approximately 2 to 3 months.
- A popular period for harvesting outdoor cultivations is around September / October. It does, of course, all depend on when you started to grow them.
Monitor the leaves and buds carefully at the end of the flowering period. They will give you plenty of signs as to when they are ready for harvesting. Leaves go yellow and fall off. Buds stop getting bigger and become darker in colour. But choosing the perfect harvest time is slightly more difficult than that.
Looking for professional plant nutrition for the growing and flowering phases? We can help you!
Harvesting at the Right Moment
Harvesting weed at the right moment is more difficult than you might think. Many novice growers focus all attention on the growing and flowering phases but neglect to pay attention to the harvest. If you don’t harvest your weed at the right moment it can loses its vitality. If the plant is at the peak of its flowering period then all the active substances are at optimal strength. Still waiting after this? Then THC, for example, may rapidly degrade or change into other cannabinoids. Obviously, we don’t want this to happen. So, when is a plant ready for harvesting then?
Trichomes or Resin Glands on Buds
You can ascertain the best moment for harvesting from your buds. At least, from the tiny hairs on the bud. These are called trichomes, or resin glands. To see these properly, you actually need a small (pocket) microscope. You can get a handy microscope, for example the LED Microscope from Trichoscope, for a low price. If you look closely at the ‘hairs’ on the bud, you’ll see that there are resin glands on them. It’s the resin glands where ultimately the THC is to be found. We can divide the resin glands into 3 states:
- Can you see transparent resin glands? Then your weed is not yet ready for harvesting. Without a microscope they look like white hairs and under the microscope they resemble little water droplets. The tiny water droplets (resin glands) are not yet full of active substances such as THC. Do you want strong weed? Then leave the buds a bit longer.
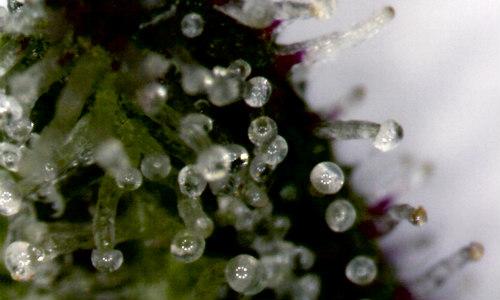
Transparent and cloudy resin glands
- Cloudy resin glands mean it’s time to harvest! At least if you want THC-rich weed. White and cloudy resin glands are brimming with THC. If you examine the whole bud with a microscope, you’ll see that not all glands are completely white. They continue to develop separately from each other. So wait until the majority of the resin glands are cloudy for a harvest at optimal strength.
- Do you see that the resin glands are light brown / amber coloured? Then you need to harvest quickly if you want to keep the optimal THC percentage. Amber-coloured resin glands are less rich in THC. They do contain more of other cannabinoids, such as CBN (Cannabinol). This substance delivers a more relaxed and calming high. But you will be less stoned.
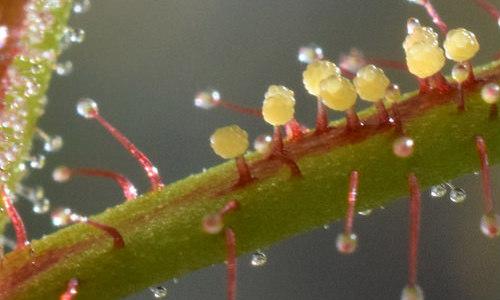
Light-brown / amber-coloured resin glands (not on a cannabis plant but illustrate what we mean)
Note: don’t hold the buds too tightly or too often when examining them. This can damage trichomes and resin glands. Resin production will cease as a consequence and no more active substances will be created.
Don’t Have a Microscope?
There’s a limit to what you can see with the naked eye. Try a magnifying glass, spectacles or a good camera on your mobile. If you notice that more than half of the hairs are light-brown / amber-coloured or beginning to be, then your cannabis is at its best and richest for THC. If fewer than half are amber-coloured, then it’s possible that certain resin glands have not yet developed sufficiently. You will miss out on that THC. Do you wait until almost all hairs are brown? In that case the THC will have converted into other cannabinoids. And that would be a pity, yes?
How Do You Harvest Your Weed?
If the trichomes and resin glands are looking good and you have decided it’s time, you can go ahead with harvesting. There are a number of things to think about when harvesting weed. Namely, cutting, drying and storing / maturing. What you'll need for these jobs are:
- Gloves
- Scissors
- Cardboard or paper storage for the buds
- Something to cover the table (e.g. baking paper)
Cutting Weed
Always wear gloves when cutting weed. Don't disregard this. Without gloves your hands will stick to everything and you’ll end up with a hash-like deposit on your fingers that’s difficult to remove. The same goes for your table. Do you like to sit here in comfort to eat every evening? Then make sure you cover it with something like baking paper. This hardly gets stuck at all.
When you start cutting, leave the plant still in the earth. It is sensible to first pick all the big weed leaves by hand. We are talking about large leaves (also called bracts) where you can see the stalk well and they do not seem to be stuck on a bud. Just as with the other waste cuttings that you’ll produce, don’t throw the large leaves away! Waste cuttings are often rich in THC and other active substances. You can make oil, tea, cake or other things with them.
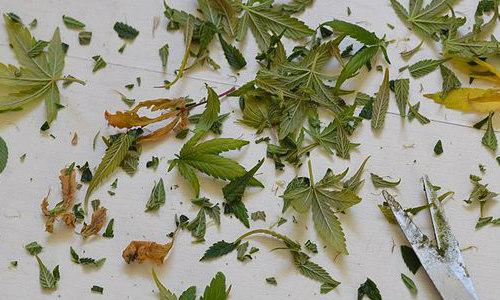
Once the big leaves have been pruned, it’s time to remove the small leaves between the buds. Everyone has their own way of doing this. We advise you to work branch by branch. Cut off a branch and use small scissors to cut away all leaves between the buds. Cut the leaves as short as you can to leave as little of them as possible around the buds (keep your waste). Really tiny leaves can just be left in place. The part of the leaf nearest to the bud is the richest in THC. In addition, the tiny leftover leaves will dry and be drawn, as it were, into the bud.
Drying Weed
Weed that comes directly from the plant is not immediately ready for smoking. The buds must be dried first You can do that in different ways. Drying will take about 2 weeks. It’s important to let your weed dry in a dark place and not speed up the process with a heater or any other heat source. The ideal temperature for drying is room temperature, i.e. around 21 degrees Celsius. Always allow fresh air to circulate around the weed to prevent mould occurring. Switch on an extractor if possible. This refreshes the air and counteracts the strong smell of drying weed. The perfect air humidity for drying is 50%.
Three simple methods:
- Hang up weed in a dry place. Good places for this are your growing room, a wardrobe or a kitchen cupboard. Fit some hanging wires and hang your weed on them. Think about the temperature and refreshing the air. Monitor the weed carefully and watch out for mould.
- Drying in a cardboard box. For example, a shoebox or small removals box. Make holes in the boxes so that clean air can get to the weed. If you’re drying the weed flat it’s important to turn over the buds occasionally. So that they dry evenly. Buds lying flat never dry fully in a regular manner. That’s why it’s always better to hang them up.
- Use a drying rack of nets or mesh. This method is frequently used for larger harvests. When using a drying rack, you need to ensure you give the buds enough room. In this way the air can get to them and they’ll dry more evenly. Special drying racks are sold on the Internet. These racks have sufficient room between each layer and you can take the layers out of the rack one by one. If you use a rack, make sure the moisture from the buds is able to escape somewhere. Do this by ventilating the air to keep it refreshed.
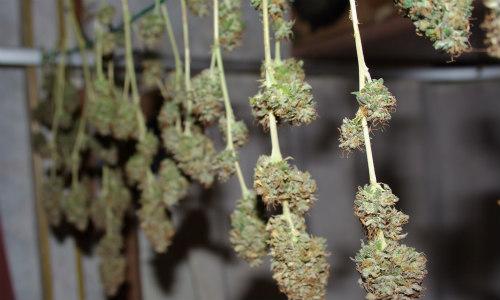
Your buds are properly dried once there is no more moisture in them. You can feel this. Start to feel them after about 10 days. If you feel that the bud is still supple, more drying is needed. When you observe that the buds crumble easily and that they no longer have a ‘solid structure’, then they have dried properly. You can always try the break test with the twigs from your buds. Do you hear a clear cracking noise? Then your weed is dry enough. Can you still bend the twig and don’t hear a clear cracking noise? Then leave them a bit longer.
Maturing or Storing Weed
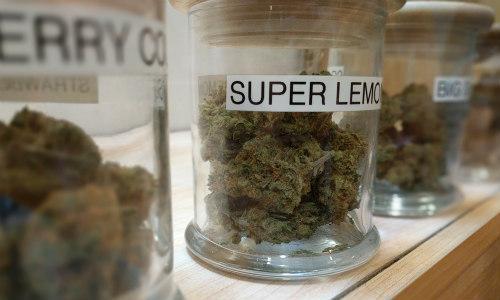
After you have dried your precious weed, the next task is to store it properly. This is important for the weeds curing process. Curing is particularly important for the taste of the weed. It can also influence the high to some extent. It’s best to store and mature weed in (glass) jars. A large zipper bag is another option but a jar is better because here the weed gets more space and is not pressed together.
Don’t fill the jar or bag until you can’t get any more in. Fill the storage medium to ¾ full and leave one quarter for air. As before, the perfect condition for maturing weed is a room temperature of 21 degrees. In contrast to the drying process, the air humidity can now be somewhat higher. 60% is ideal. Various products can be bought to help you keep the air humidity in your storage stable. For example, dehumidifier bags.
Needless to say, we wish you the best of luck with your weed harvesting! We are also curious to hear about your experiences. Perhaps you could leave a short review on the product page of the seed you bought? For example, was your yield up to expectations?
Do you need more help and/or was your question not answered by this article? Our customer service staff are ready and waiting to answer your questions.