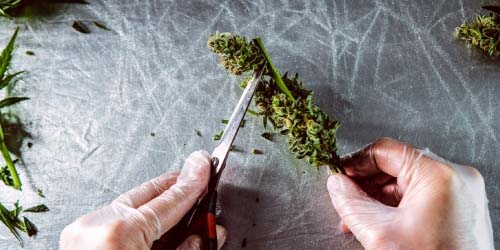
Cutting weed is a meticulous and time-consuming task. Especially if you have never done it before. Of course you want your weed to look good and the taste to be unaffected by branches and leaves. So read this blog carefully. When, why and how to cut weed? We answer all your questions. With the help of our clear instructions and accompanying pictures you will be doing it yourself in no time!
In dit artikel:
- Why cut weed?
- When to cut and dry weed?
- Parts of the Weed Plant
- Preparing to cut weed
- How to cut weed? Dry vs Wet
- Cutting wet weed: Steps
- Cutting dry weed: Steps
- Practical Tips from Experts
Why cut weed?
Inexperienced growers will be wondering why you need to cut weed before you can smoke it. First of all, branches and the bract leaves of weed plants do not contain trichomes. Those are resin glands that contain cannabinoids such as THC and CBD, among others. So branches and bract leaves have no effect when you smoke them. Secondly, the smoke coming from leaves and branches tastes bad and it causes a sharp feeling in your throat. Good quality weed should therefore ideally not contain any branches and leaves.
When to cut and dry weed?
The timing of your weed cutting is very important. As weed blooms and matures, its composition changes. For example, weed that sits longer on the plant contains more or different cannabinoids, terpenes and flavonoids. So it's important to choose the right time. You can determine the right moment in two ways:
- Check the specifications of the weed strain you are growing. Pay close attention to the flowering time in particular. The flowering time is expressed in the number of weeks that the plant needs to bloom. Look carefully at when your weed plant begins to flower and add the number of weeks to that. The weed plant is then ready for harvest.
- To determine the perfect moment you will need to look at the trichomes on your buds. You can do this with a special weed microscope. The trichomes change in appearance the longer the weed blooms. Trichomes can take three forms: translucent, cloudy or amber. When most of the trichomes on the weed look cloudy they contain the maximum amount of cannabinoids and it's time to harvest.
For more information on when to harvest and cut weed, check out our blog “How and When to harvest weed”.
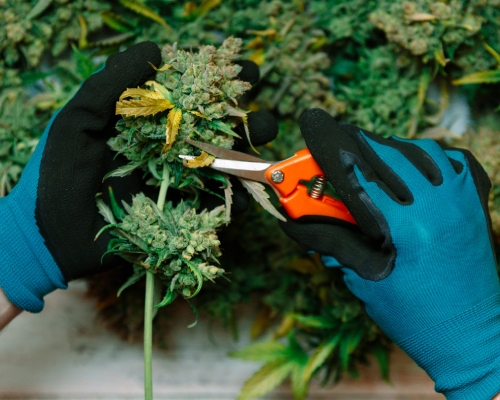
Cutting weed with Leaf Kleen Pro weed scissors.
Parts of a Weed plant
Before we go on to explain to you the best way to cut weed, you should first know what the different parts of a weed plant are called. We try to keep the explanation easy to understand. Here is a list of terms we use in our instructions.
- The stem of the weed plant is the most central and thickest branch of the weed plant. It emerges from the center of the flower pot. It is the center of the weed plant.
- All kinds of side branches grow from the stem. These are the branches that are directly connected to the stem.
- Attached to the side branches are stalks. These are thinner branches that are connected to the side branches.
- On the stems grow bract leaves (fan leaves) and weed buds (colas). Bract leaves are the large weed leaves, identified by five, seven or sometimes even nine fingers. They are attached with smaller stalks to the larger stems. Weed buds are the parts of the weed plant that you are going to smoke. They grow on the stalks.
- Between the weed buds you will find sugar leaves. These are the small leaves that are between the buds. Please note that unlike bract leaves, sugar leaves do contain cannabinoids such as THC and CBD. Do not throw them away when cutting. You can make other cannabis products from them such as edibles, cannabis oil or dabs.
Preparing to cut weed
Before we tell you step by step how to cut weed, you need to make some preparations. For example, did you know that weed is incredibly sticky and has a thick green resin? We strongly recommend that you use latex gloves. This will prevent that thick, green layer of resin from getting on your fingers and sticking to everything. Also cover your table. The resin is very stubborn to remove and can leave nasty marks on a beautiful table. For example, use old tablecloth or bedding.
After cutting comes drying. Make sure you prepare for drying as well. If you do not start drying immediately after cutting, it may become mouldy and your harvest will be ruined. If you are going to cut wet weed you will need a drying net, for example. If you choose to cut dry weed, you will need to set up a box or your growing spacein advance. Think about blackout and hanging up clotheslines to hang the stems full of weed. Later on we will explain the difference between dry and wet weed cutting.
To make it easier on yourself, it's best to get a good pair of weed scissors. Ordinary paper or kitchen scissors won't allow you to be precise enough and will take longer to cut weed. Invest in a Leaf Kleen Pro or Verdemax Professional Scissors. Small bonsai scissors are handy for the small sugar leaves. Also, a couple of large bins or buckets are useful. Take a large container for branches and bract leaves. You can throw those away. Take a smaller container for the cutting waste (keep it! You can still use it). Finally, take a container for the valuable buds. Cover the inside with a plastic bag so the weed does not stick to it.
Put on some great music and make it fun, because you'll be busy for a while!
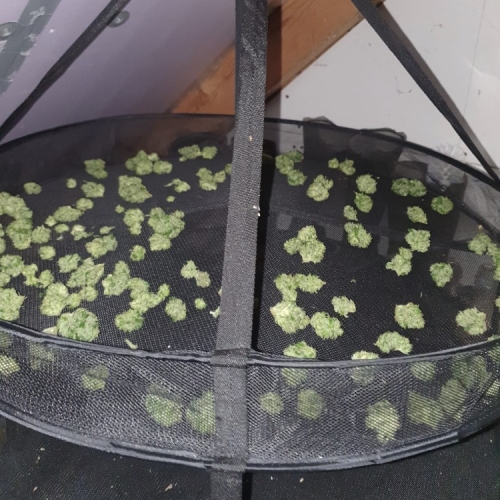
Drying net full of weed buds.
How to cut weed? Dry vs Wet
How to cut weed? It can be done in two ways: Dry cutting and wet cutting. The difference lies mainly in when you remove the sugar leaves and how you go about drying the weed, after you have cut it.
With dry weed cutting you work in two stages. You cut away the stem, branches and the bract leaves until you are left with stalks. On those stalks you will find buds with sugar leaves. You let those dry first, before removing the sugar leaves. The advantage? The weed takes longer to dry. That sounds negative, but it's not. This way, the taste and smell will improve over other drying methods.
With cutting weed wet, you cut everything at once. You literally remove everything, until all you are left with are beautiful weed buds. The consequence of this is that you cannot hang any more branches. You will therefore have to let the weed buds dry in a drying net. Advantages of wet cutting? It is easier and you are done in one go. Choose this method if the only space to dry you have is a barn. In autumn barns are often damp and you want to keep your weed in damp areas for as short a time as possible to avoid mould. So preferably not in the barn! After drying you don't need to do anything more. Curing is optional. The weed, provided you do it carefully, will also look nicer.
Cutting dry weed: Steps
Time to skillfully dissect your weed plant. Are you ready? Weed scissors at hand? Table covered and gloves on? Drying room ready? Great! We begin by explaining the method of 'cutting dry weed'.
- Start at the stem and work from the bottom to the top. With your scissors, cut off the large side branches of the stem. Lay them out scattered around the table. It is best if they do not touch each other. Note that all side branches you take off the stem must be cut completely. If you leave cut branches or stalks for too long, they may wilt. Weed buds can go mouldy. So only cut off from the stem what you are going to finish that day. If necessary, work in stages.
- Pick up a side branch one at a time. Hold the branch upright in your hands. Cut - as close to the side branch as possible - all the stalks. Spread the stalks out on the table. Discard the large side branches.
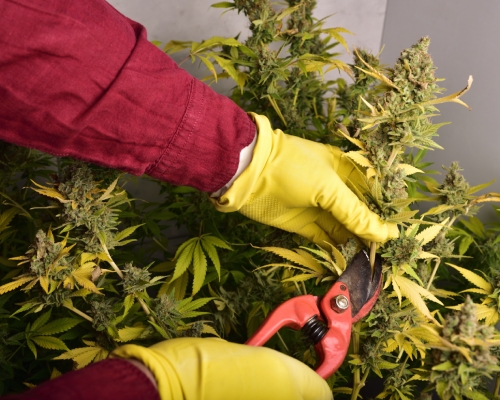
The stalks are being cut from the side branches here
- Pick up one side branch at a time. Hold these upright in your hands again. Now remove all the bract leaves. These are the large leaves that are not between the buds. Bract leaves are often connected to the larger stem with a small stalk. The best way to remove them is to hold them close to the stalk and press them down along the stalk, as it were. They then break off almost naturally. You can also use scissors, but that takes more time. Discard all bract leaves.
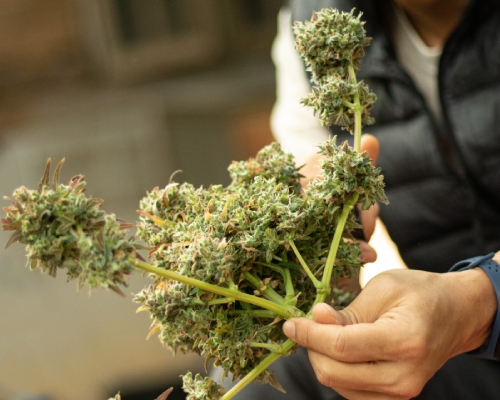
Stalks with weed buds and sugar leaves
- If all goes well, all you have left now are stalks with weed buds and sugar leaves. As shown in the picture above. You can still cut the smaller stalks off, so that you are left with only straight stalks with weed buds. Once you've reached this point, you can let the weed dry. You can do this by hanging the stems upside down on a clothesline. Important: make sure the buds are hanging in a completely dark room, there is sufficient air circulation, the humidity is good and the temperature is right. Failing to do so? Then you can ruin all your weed.
For clear instructions and more information on drying weed, check out this blog: “Drying and curing weed in a few steps”.
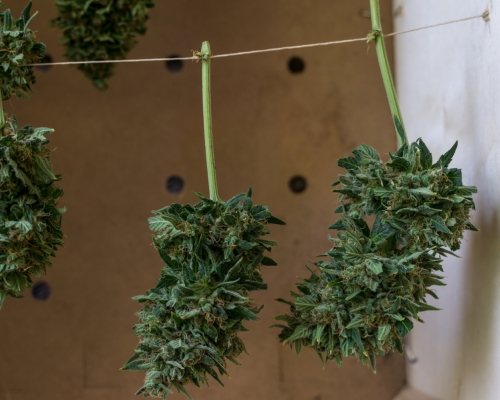
Weed buds drying on a clothesline
- You're not done yet! When the weed is dry after two to three weeks, you still need to cut the buds off the stalks and remove the sugar leaves. Take the stalks one by one from the clothesline. Look carefully where the weed is connected to the stalk and cut the buds off one by one.
- Pick up the buds and remove the sugar leaves. This job takes the most time. When the weed is dry, the sugar leaves will almost automatically 'break off'. But be careful! Do not pull them off the buds while they are still attached. This will cause the buds to break and that is a shame. Carefully reach between the buds with a small pair of scissors and snip off the sugar leaves.
Dry weed cutting is done! You now have beautiful weed buds. They are already dried, so you can immediately smoke them, vape them or do whatever you want with them.
Cutting wet weed: Steps
Cutting weed wet is very similar to the dry method. If you decide to cut wet, it is important that you have a drying net at home. This method takes quite a bit of time. You will not be done in an hour. Be prepared for that!
- For the first step of cutting weed wet, we like to refer to the first three steps of the step-by-step plan above. So remove the side branches from the stem. Cut the stalks from the side branches and remove all bract leaves.
- After you've done this, you'll be left with small stalks with weed buds and sugar leaves. Take a stalk and hold it upright in your hands. Work from the bottom to the top, going down each top. Very carefully cut away the sugar leaves between the top. This job takes the most time and requires precise work. Make sure the buds do not break. So do not pull!

Cutting sugar leaves between the buds
- You are going to prepare the weed tops for use. Very carefully bend the weed tops away from the stalks. Look for the spot where the bud is connected to the stalk and carefully cut the buds off. Do you see a large branch still attached to your bud? Then repeat the above instruction. Gently bend the bud open and again look for an attachment. In the end you will be left with only beautiful buds, without large branches.
You've finished cutting your weed. If all goes well, you have a container full of weed buds. All you have to do is dry them. For this you need a drying net. A drying net often has several layers. Spread the buds over all the layers and make sure they do not touch. Also with this drying method the room must be completely dark and the temperature, humidity and air circulation in good order. Check every few days to see if the buds are dry yet. If necessary, turn them over to make the drying process faster and more gradual.
Practical Tips from Experts
Find help!
Do not cut all by yourself. You can manage one small weed plant. But with a few large weed plants you will be busy for hours. Call your friends and give them a bag as a reward. You'll be done sooner and it will be fun!
Take your time and work precisely
Don't rush the process. This will not benefit the quality of your weed. Take your time. Especially when cutting the buds and the sugar leaves. The more precise you are the more beautiful the buds will look.
Sufficient space
Make sure there is sufficient space. Usually you cut with a number of people. Cut in a large room and make sure everyone has enough space to put the weed down and cut. This will prevent irritation and annoyance. The work will also go faster.
Clear division of tasks
The best tip: make a clear division of tasks. To go through the complete process with each branch is tedious and takes a long time. For example, have someone cut the side branches or stems and remove the bract leaves. Then the other person can cut the buds and remove the sugar leaves. You make sort of a little train. You'll find that the work goes faster and you don't have to change scissors as often.
Cutting machine for weed
Some growers use a special cutting machine for weed. Such a cutting machine takes a lot of work out of your hands. All you have to do is remove the bract leaves and cut the buds from the stalks. You then place the buds in the cutting machine. With the help of small knives the sugar leaves are removed. The buds then only need to be dried. You can find cutting machines on the internet or at the better grow shops.
The use of trimmers is controversial. Growers claim that it damages the weed. The trichomes are said to be knocked off the weed tops, reducing the quality. You, on the other hand, save loads of time. It's worth considering.
Cure Weed
After you have let the weed dry you can still choose to cure it. You can do this by storing the weed in an airtight jar under the perfect humidity. The weed will continue to ripen in the jar, as it were. The flavour, aroma and effect of the weed will be considerably improved. Read more about curing weed in this blog.
What to do with the weed and the cutting waste?
Finished cutting and drying? Then you can start smoking, vaping or consuming the weed in some other way. Check out these blogs to get some ideas.
- 8 things you can do with your Cannabis Harvest
- Making Space Cake: The Ultimate Space cake Recipe with Weed Butter
- Edibles Recipe: THC Gummies
- Course for Making Dabs - Part 1: Making Rosin
- Cannolator Manual