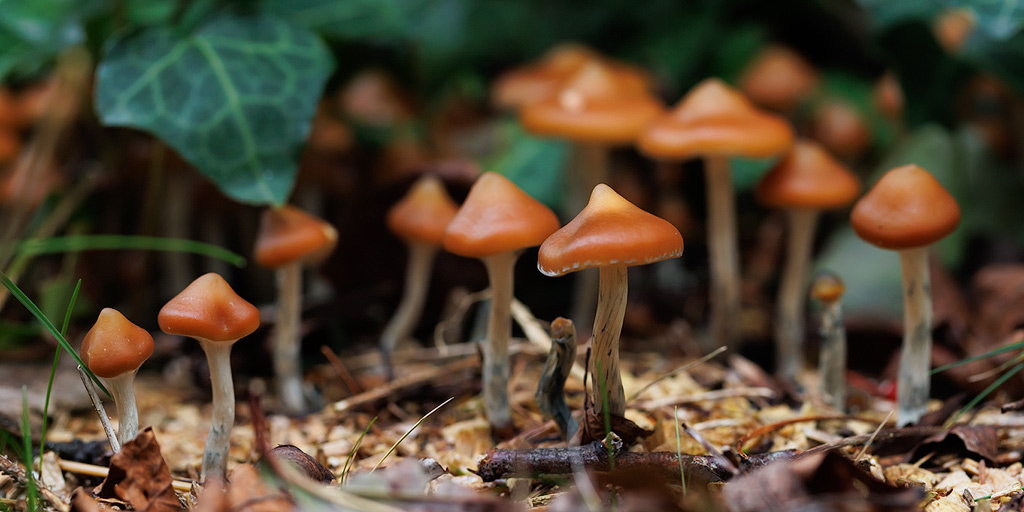
Grow your own Azurescens mushrooms in your garden with these instructions! These powerhouses are not for newbies. This applies to both the trip and the cultivation. Curious about what these mushrooms are and how to proceed? Read on quickly!
In this article
- Psilocybe Azurescens: The Strongest Mushrooms in the World
- Differences with Cubensis
- What are Psilocybe azurescens mushrooms?
- Azurescens Parameters for Enthusiasts
- How to Grow Psilocybe Azurescens?
- Psilocybe Azurescens Cultivation Report with Photos
- Preparing the Spawn
- Time to Plant the Fungus!
- Planting Mushrooms
- Harvesting Mushrooms
- The Yield
- Be Careful When Picking Mushrooms
- How to Recognize Psilocybe Azurescens
- Conclusion
Psilocybe Azurescens: The Strongest Mushrooms in the World
Psilocybe azurescens mushrooms are on average twice as strong as regular cubensis mushrooms. This is because they contain more hallucinogenic substances per gram, such as psilocybin and psilocin. Some specimens of this species contain up to 20 times that amount. These huge differences are probably due to favorable growth conditions, but also a bit to genetics. There are, by the way, many more species of mushrooms. Hundreds of species contain psilocybin to varying degrees. According to several studies on the potency of mushrooms [1,2,3], these are the top 10 strongest mushrooms:
- Psilocybe azurescens
- Psilocybe serbica var. bohemica
- Psilocybe serbica var. moravica
- Psilocybe cyanescens
- Psilocybe semilanceata
- Psilocybe zapotecorum
- Psilocybe serbica var. serbica
- Psilocybe caerulipes
- Panaeolus cyanescens
- Psilocybe cubensis (Golden Teacher, Mexicana, Penis Envy, B+, Albino, etc.)
Differences with Cubensis
Yes, you saw that correctly. Cubensis, the most sold type of mushrooms in ready-to-use mushroom grow kits, is tenth on the list of strongest mushrooms. Still, there’s a reason why cubensis mushrooms are so popular. The controversial R. Gordon Wasson and his wife Valentina Pavlova brought this species back from Mexico in 1957 after a night of ritual tripping under the guidance of Mazatec shaman María Sabina. A year later, the inventor of LSD, Albert Hofmann, isolated psilocybin from mushrooms. Since then, people have been looking for ways to grow mushrooms at home. And they succeeded quite well. With a mushroom grow kit, you can grow cubensis mushrooms yourself in just a few weeks.
Comparing cubensis mushrooms to azurescens mushrooms is like comparing apples and pears; both are fruit and contain vitamin C, but that’s about all they have in common. There are Fuji apples, Granny Smiths, Conference pears, and cooking pears. Within those varieties, mushrooms also have variations. Just like with cannabis, we call these varieties “cultivars” or “strains.”
The optimal growing conditions between azurescens and cubensis differ enormously, which is why growing them in such a grow kit is simply not possible. Still, that doesn’t stop people from finding other methods to grow the strongest mushrooms in the world. At the time of writing, only a few specialists have managed to grow azurescens mushrooms indoors. But there are countless people who have succeeded in growing them outdoors, including the editorial team of Dutch-Headshop. And that’s what the rest of this article is about.
What are Psilocybe azurescens mushrooms?
Psilocybe azurescens thrive in a moist forest. In the wild, they are mainly found in the Pacific Northwest; the temperate rainforest in the north of the US and Canadian west coast. This species was first discovered there by none other than Paul Stamets.
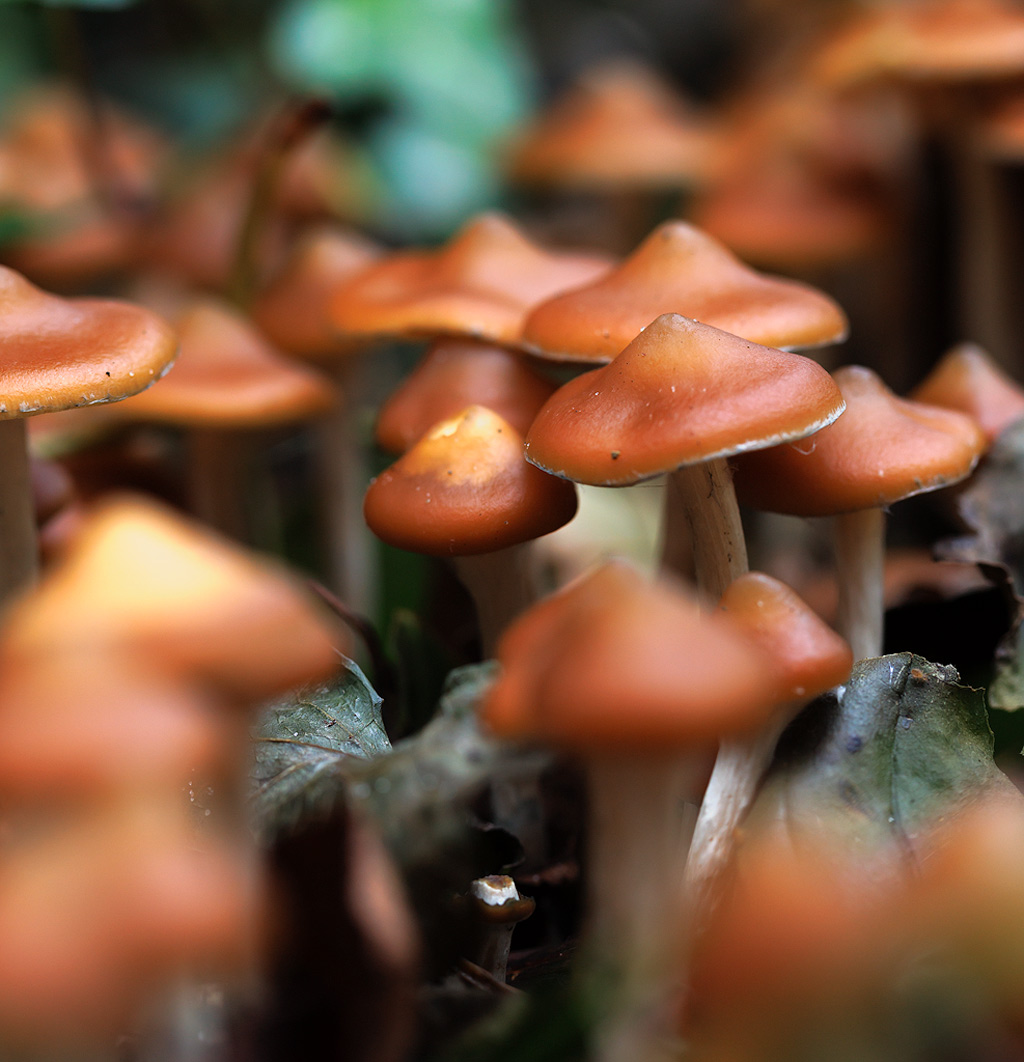
Since they don’t grow in the tropics but in temperate, moist conditions, they can also be grown in Europe. However, it is not wise to introduce species into a location where they don’t naturally occur. Not only because your mushroom yield will be low or likely fail, but also because you contaminate the environment with a species that doesn’t naturally belong there. And this could affect trees, animals, or other fungi that can’t cope with this species.
But with azurescens mushrooms, you don’t have to worry about contamination. Like their very close relative Psilocybe cyanescens, they derive their nutrition from dead hardwood such as beech, birch, and oak. Their favorite meal is beechwood, but they also enjoy other hardwood species. The presence of grasses makes the conditions absolutely ideal.
Azurescens Parameters for Enthusiasts
Want to mimic the ideal growing conditions? Here’s what Psilocybe azurescens likes:
Spawn run indoors (multiplying spawn in sterile beechwood)
- Temperature: 20 degrees Celsius.
- Humidity: 95%.
- Light: complete darkness.
- Substrate: sterile beechwood, covered with wet cardboard.
Growing mushrooms outdoors
- Climate: temperate maritime climate (mild, wet winters and mild summers).
- Light: shaded environment.
- Substrate: sterile beechwood, covered with (non-sterile) garden soil and grass seed.
How to Grow Psilocybe Azurescens?
Unlike most of our grow kits, mushrooms from an azurescens spawn bag grow on wood. A container of azurescens spawn is a combination of substrate and young fungal threads that we call mycelium. In that sense, it’s similar to what you get in a mushroom grow kit.
If you compare it to plants, such a container is like a cutting of mushrooms. It takes quite some time before “flowers” (mushrooms) grow from your cutting. Mushrooms are the reproductive organs, just like flowers in plants. Mushrooms only appear later in the life cycle of a fungus. You may have to wait half a year to a year for your harvest. And that’s if everything goes well and the weather is favorable. Keep that in mind.
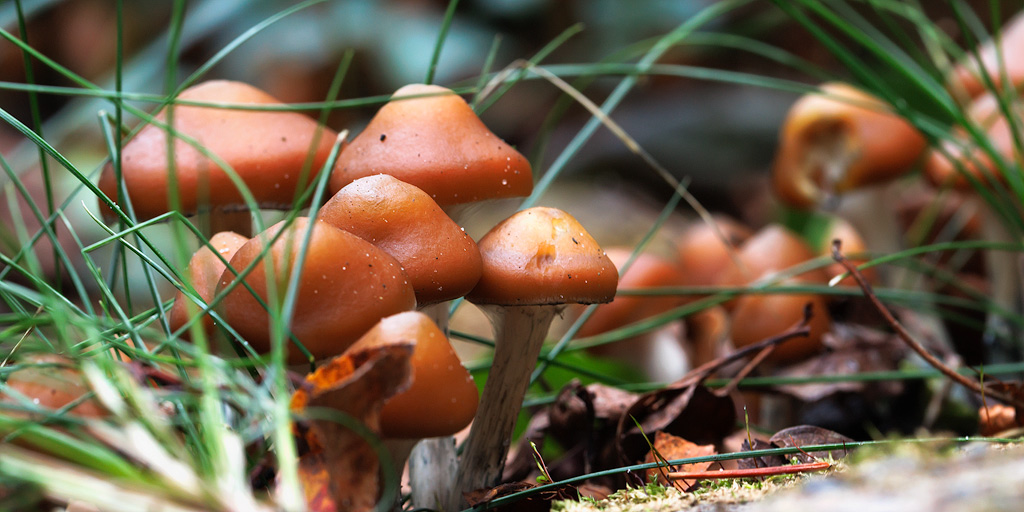
The advantage of azurescens is that once mushrooms start growing, you are assured of endless growth. Every year, mushrooms will reappear, sometimes multiple times a year. The only thing you need to do is add a bit of beechwood chips, which you can buy at most pet stores.
In the first year, we had 2 whole mushrooms. In the second year, we were able to harvest a kilo of fresh mushrooms from our own garden in October. More on that later. Read our cultivation report.
Psilocybe Azurescens Cultivation Report with Photos
Preparing the Spawn
January 21 - The Psilocybe azurescens spawn has arrived! I store it in a cold shed and buy the following items:
- 5 liters or more of shredded beechwood.
- A large plastic storage container with a lid, large enough for the wood to fit comfortably.
- A bit of cardboard.
- 5 liters of potting soil.
- Optional: grass seed.
- Optional: a large pressure cooker.
The idea is to give the mushroom spawn more food to strengthen the fungal colony. You can start small and grow the colony as big as you want.
Before you plant the mushrooms outside, ensure that at least 5 liters of wood chips have been colonized. At the garden center or pet store, you can buy a large bag of fine beechwood chips for around ten euros, containing 10, 25, or even 50 liters. Keep in mind that the larger the bag, the more work it will be, and the longer it will take for the mushroom mycelium to take over the entire container. The bigger the colony, the more resilient your mushrooms will be to infections.
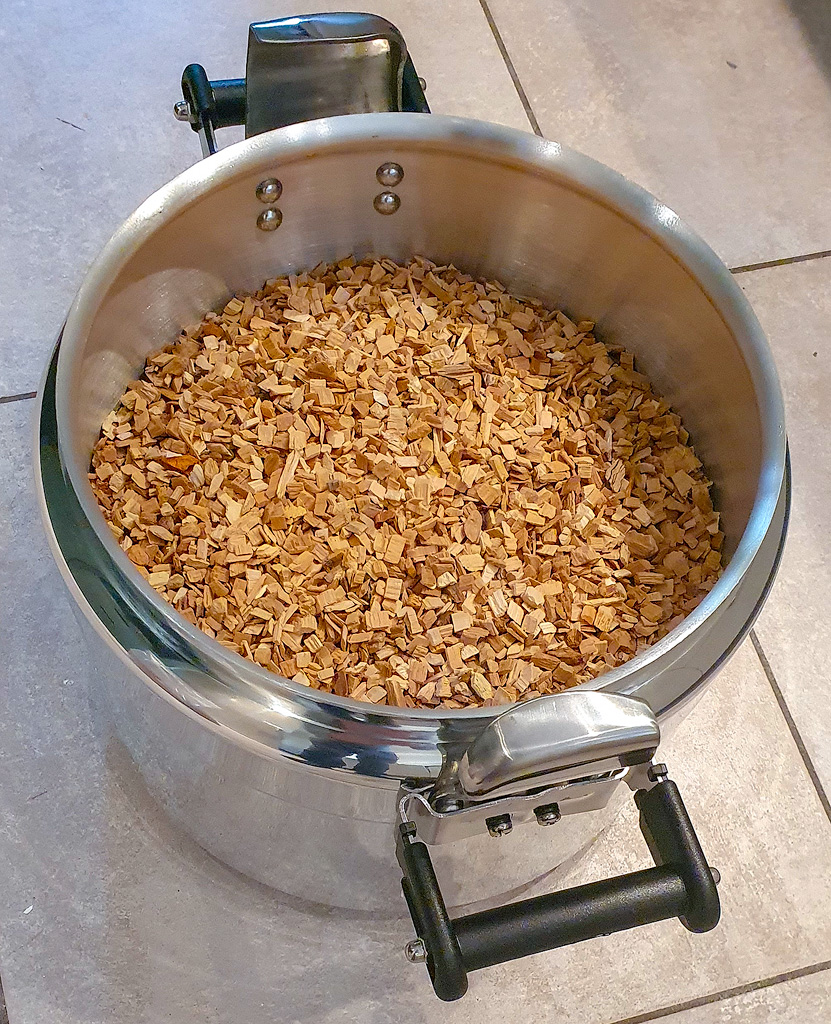
I placed about 5 liters of beechwood chips in a large pressure cooker with about 1 liter of water. By shaking the pot well before cooking, all the wood becomes thoroughly moist. You can also clean your wood by soaking it in water that has just come to a boil, but that takes longer. Drain the excess water from the pot or container.
By pouring boiling water over two forks, I disinfect them. Let’s open the packet of azurescens spawn. I break up the spawn with two clean forks into small pieces of roughly equal size. I place the spawn pieces at different spots in the container of sterile wood chips. Also, make sure you have enough room for the spawn, so discard any excess wood chips before adding the spawn.
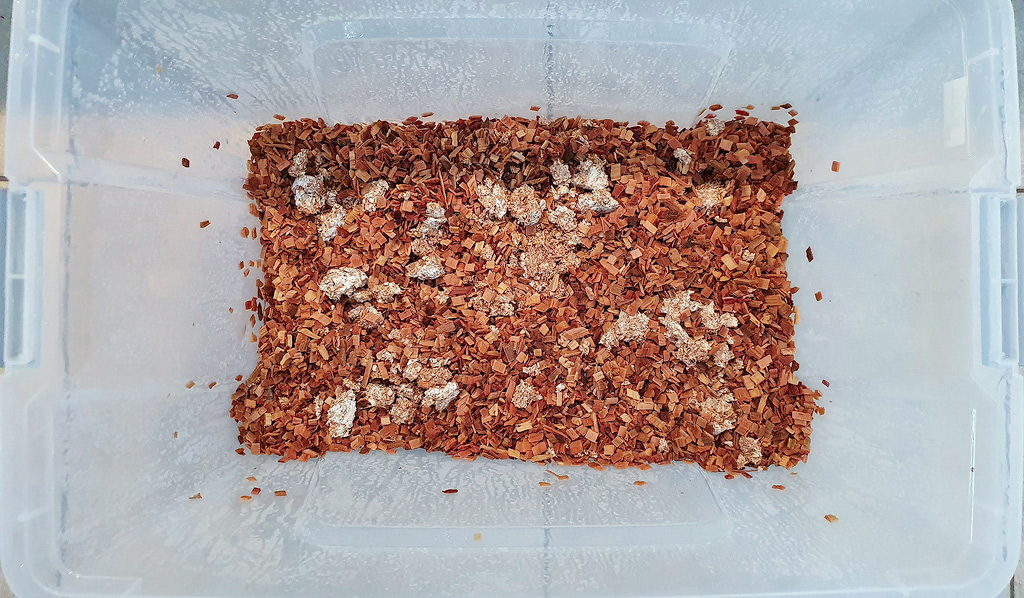
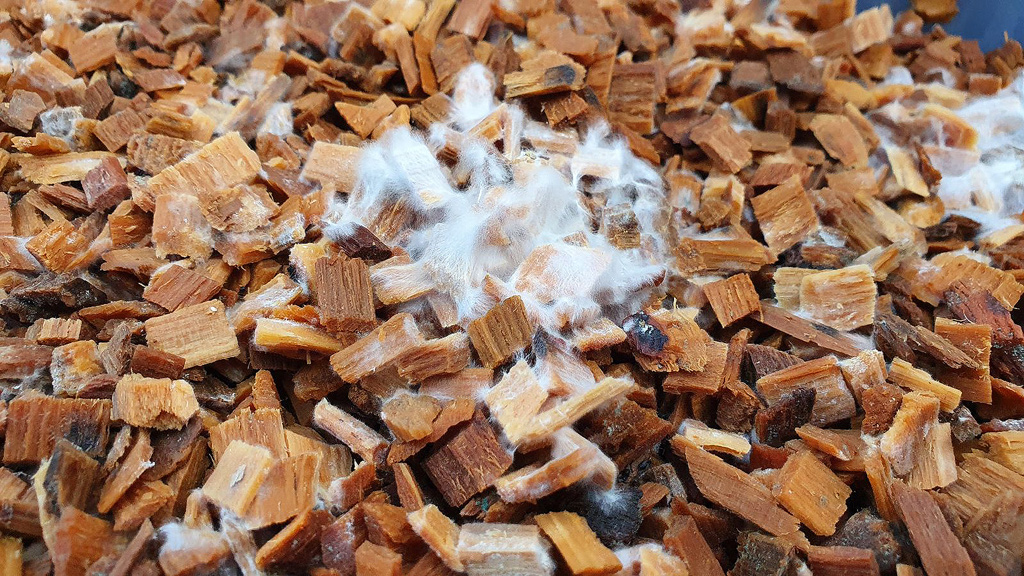
Then, add another layer of sterile wood chips to the container, so the fungus is trapped somewhere in the middle. Azurescens mycelium can grow much faster on brown cardboard, but it doesn’t have enough nutrients there to produce mushrooms. To help the first stage, I cut a piece of brown cardboard from a box to size and pour plenty of boiling water over it to clean it. I then cover the wood chips with it. Now it’s just a matter of covering and loosely placing the lid on the container. I leave the container in the shed for about a month to see if the wood chips start turning white. If the wood chips dry out too much in the meantime, I spray them with a bit of boiled and cooled water.
Time to Plant the Fungus!
March 31 - The fungus has beautifully spread throughout the container. So now it’s time to “plant” the mushrooms. Azurescens mushrooms thrive in the shade. As long as they receive a little light, they get the signal to grow upward. Plant the mushrooms under a tree, between bushes, or under an overhanging branch.
We’ve picked a nice spot in the shade of the house, where it’s not too wet. The weather forecast shows that the temperature will rise in the coming weeks. It seems like the temperature won’t drop below freezing anytime soon. That’s the time to take the mushrooms out of their incubation box and give them a permanent place in the garden.
Planting Mushrooms
I bought an extra bag of wood chips for food. This is probably why I saw almost no mushrooms in the first year, and a year later, a true fairy ring appeared, enough to make an entire village trip. To plant the mushrooms, tip the contents of your container of wood and fungus into an empty cardboard box. Then bury the box in the garden. Personally, I found it easier to place the cardboard in a large hole in the ground first and then fill it, as the weight of the infected wood can break the bottom of a box. In any case, remove all the plastic (tape and labels) from the box.
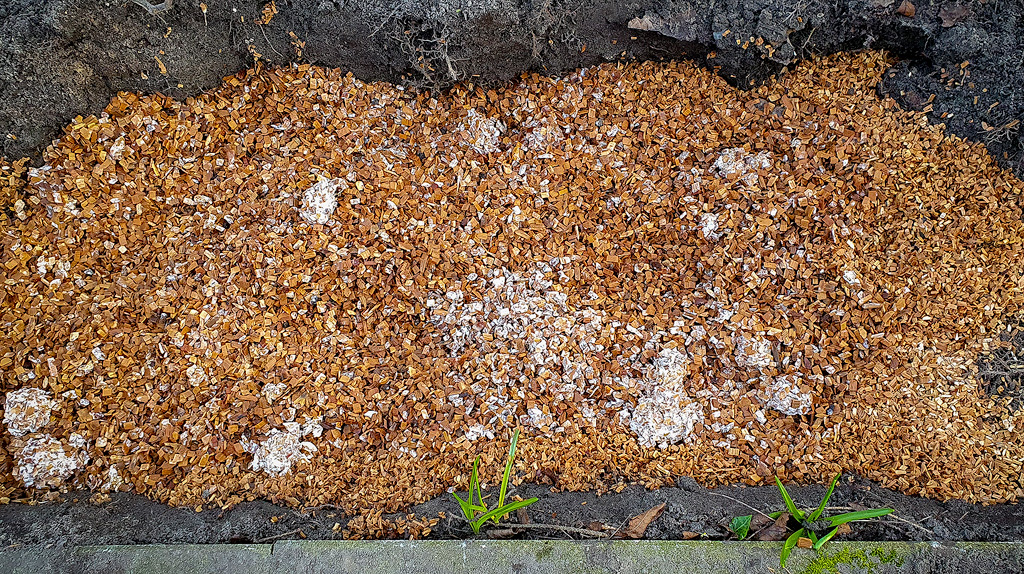
If you have experience with cubensis mushrooms (which we highly recommend, as it is much easier), you are already familiar with the formula: disinfect your hands, don’t breathe towards the grow kit, and clean your tools. In the box, we first lay a small bed of fresh wood chips. The same chips that we used to grow the spawn. Pour boiling water over the wood chips to disinfect them. Then wait about ten minutes before breaking up the mushroom spawn and spreading it over the bed of wet wood chips. Now scatter the rest of the wood chips over the spawn, followed by a layer of potting soil to cover everything. If you really want to get the most out of your grow kit, you can sprinkle grass seeds over the soil. Grass and mushrooms exchange nutrients, which benefits both. Now water a little, and your mushroom patch is ready. The rest is up to nature.
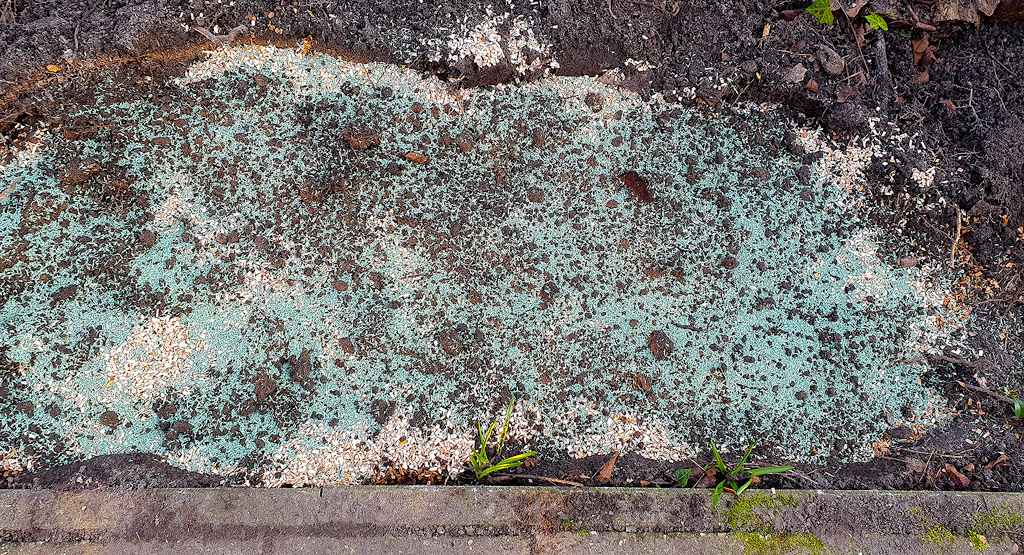
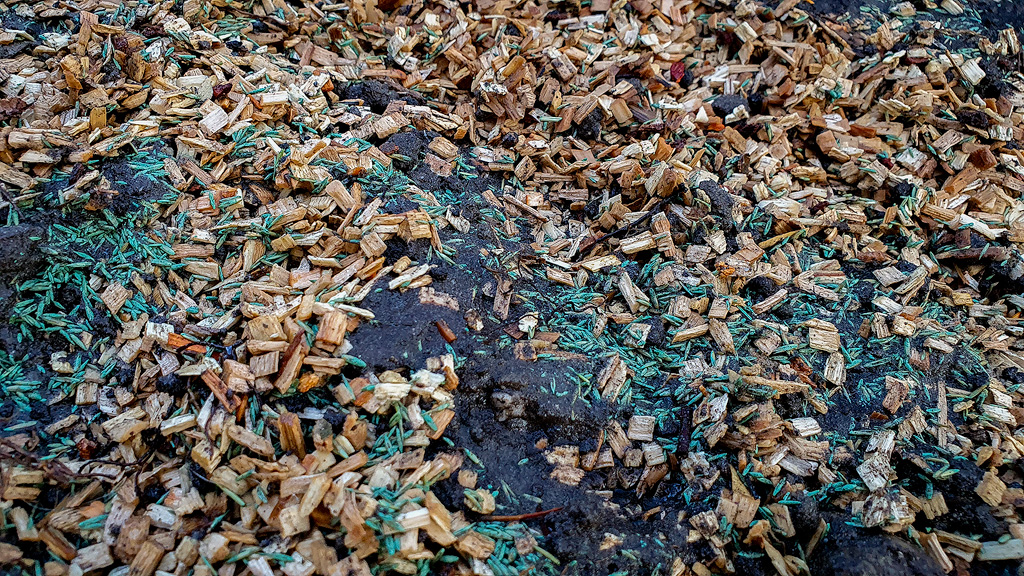
Here you can see the covered mushroom patch, about 30 centimeters deep, with grass seeds, soil, and beechwood chips.
These are the successful layers of such a growing environment, from top to bottom:
- Water - at the end, water with a watering can or garden hose with a sprayer.
- Grass seeds - you don’t need to bury the seeds in the soil. The seeds themselves provide enough nutrients for the mushrooms. You don’t need to grow a lawn.
- 5 liters of garden soil - just the cheap stuff.
- 5-10 liters of fresh beechwood chips.
- The infected beechwood.
- 5-10 liters of beechwood chips.
- Cardboard - also along the sides. This forms a first line of defense against external influences while your mushroom fungus adjusts to its new home.
Tip for Hot Summers
If it’s dry for an extended period, it’s a good idea to keep the ground of your mushrooms from drying out. Spray water over your mushroom bed.
Tip for Cold Winters
To prevent frost from penetrating too deeply into the soil, you can cover the mushroom bed with straw. The tricky part is determining when to do this. Azurescens can produce mushrooms between September and January. We recommend doing this only when more than a few degrees of frost are expected in the near future. So check the weather forecast. Don’t worry about a night or two of frost. They can handle it just fine.
The Interim Check
September 7 - The mushroom season is approaching. Soon, the forests will be full of porcini, fly agaric and hopefully also our organically grown mushrooms in the garden! Let’s take a look at how the azurescens mushrooms are developing.
We can see nice white spots as we gently brush away some wood chips. This is a sign that the mycelium survived the dry summer. Additionally, the ground feels warm. Like us, fungi breathe in oxygen and exhale CO2. This makes the ground warmer. The fact that the soil feels warmer, even in the shade when you stick your finger into it, tells us that the soil is alive and well. Just a little more patience, and fingers crossed! A weekly check is sufficient.
Harvesting Mushrooms
November 13 - On yet another routine check in the garden, we see the first caps emerging. And even almost fully grown mushrooms. You harvest these mushrooms when the membrane under the cap starts to tear.
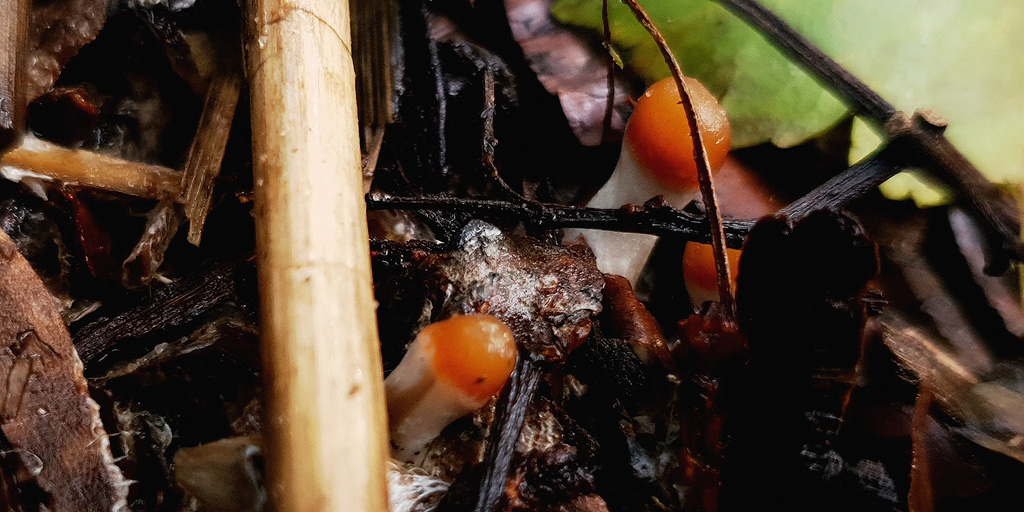
Now it’s just a matter of harvesting mushrooms when they’re ripe. A mushroom patch can produce mushrooms until January.
October 4, one year later - An astonishing number of mushrooms are emerging around the mushroom patch. We estimate that over a hundred mushrooms are waiting to be picked. There are so many that I don’t have enough space to dry them all at once, so I do it in two rounds.
The Yield
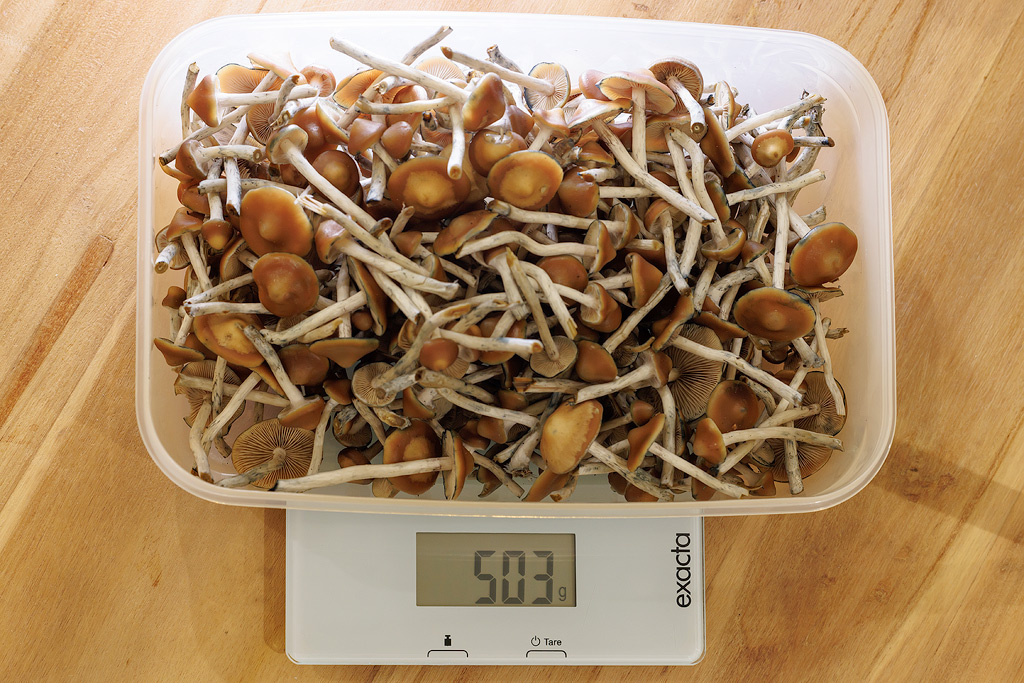
The first half weighs in at over 500 grams on the scale. A day later, I wanted to harvest the second half, but many had already dried out. They had become harder and yellower. The best mushrooms from that half weigh 183 grams in total. Time to dry them and store them.
- Fresh weight: 686 grams
- Weight after drying: 83 grams
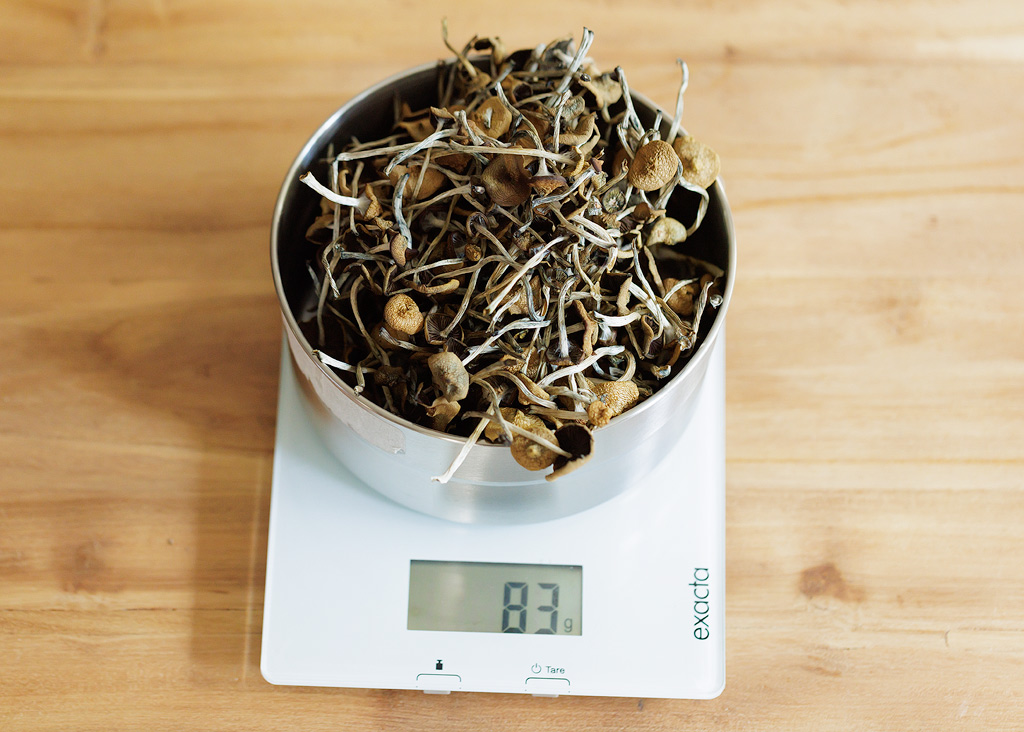
Okay, time to check what we’ve done this for. How many trips can we get from this? We use our mushroom calculator and select the potent azurescens from the list of mushrooms. For someone weighing 80 kg:
- 33 heroic (very high) doses
- 69 tourist (normal) doses
- or a staggering 1185 microdoses, enough for 5.7 years of microdosing with the Stamets Stack!
…per year. This mushroom patch of about 1.5 square meters yields this amount of mushrooms every year with just a little care.

Be Careful When Picking Mushrooms
If you are growing Psilocybe azurescens or other mushrooms, it’s advisable to thoroughly familiarize yourself with their appearance and other characteristics. Whether you’re growing them in your garden or guerrilla-growing mushrooms in the forest, identifying the mushroom species can make the difference between a great trip and a trip to the hospital. Picking the wrong mushroom can have disastrous consequences.
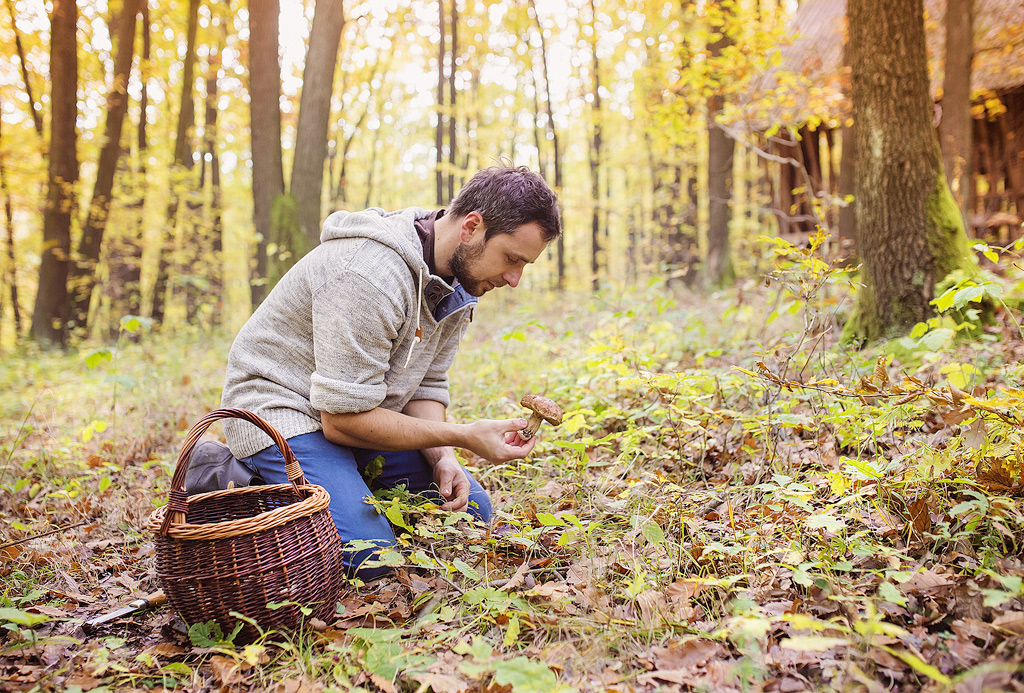
"This one"? That's not a Psilocybe azurescens, sir.
Determining mushrooms (identifying the species) is a delicate task. If you are growing mushrooms outdoors, your mushroom grow kit can become contaminated with other fungi. If mushrooms then grow in the spot where you planted them, but you don’t recognize their caps, the consequences of picking and eating them could be dangerous. Azurescens mushrooms are safe to eat, of course. But if, for example, a death cap (Amanita phalloides) grows in the spot where your secret patch is in the forest, it can be extremely dangerous. Make sure you know the area where you’re growing them. If you’ve been gardening for a few years, you’ll know whether or not mushrooms naturally grow in the place where you’re cultivating your mushrooms.
How to Recognize Psilocybe Azurescens
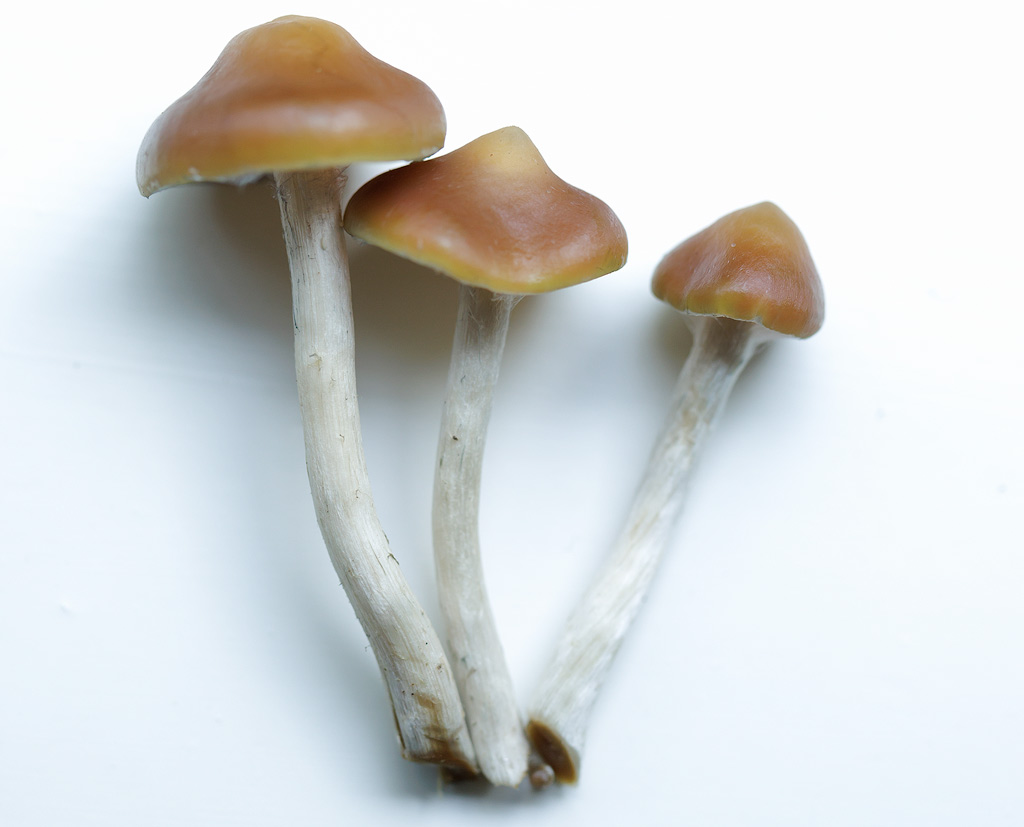
- Brown, convex cap with a small bump (umbo), 30-100 mm in diameter.
- They grow on dead wood, from September to January.
- The stem is completely smooth, 90-200 mm long, 3-6 mm thick, pale in color, and sometimes with gray or blue streaks.
- If you bruise or damage the mushrooms, they turn blue in that spot within a minute, both on the stem and the cap.
- The stem can have white fuzz and azure-blue shades. That’s where the mushroom gets its name.
- Brown gills on the underside of the cap (hymenophore).
- The gills may slightly extend towards the stem.
- The spore print is dark brown to black with a purplish hue.
- Odorless or smelling like baker’s flour. Large clusters of mushrooms amplify the smell.
- Lastly: very bitter in taste.
In short, at first glance, a rather inconspicuous brown mushroom. Extremely well camouflaged when growing from dead wood. Two deadly species that resemble them are Conocybe rugosa (formerly known as Pholiotina filaris) and Galerina marginata or -autumnalis. These mushrooms do not have a bump on top, do not turn blue when bruised or picked, have a ring around the stem, and have lighter, brown spores [3]. In all these respects, they differ from edible* and hallucinogenic mushrooms. Read more about identifying these and other mushrooms here.
*In most mushroom guidebooks, all mushrooms from the Psilocybe family are labeled as inedible or even poisonous. Often it’s not even mentioned that they cause hallucinations. This could be due to the quantity required, discouragement policies, or the author’s opinion. However, if you read the book “Psilocybin Mushrooms of the World” by Paul Stamets, you’ll find detailed descriptions of many psilocybin-containing mushrooms. Yes, you might feel nauseous, vomit, or experience brief stomach pain after consuming any of these mushrooms. But after that, an incredible trip begins. It’s best to eat them on an empty stomach: don’t eat anything for 3-4 hours before ingestion. This reduces discomfort and also means you need less for a strong effect. Our mushroom calculator assumes an empty stomach. Also, never combine them with alcohol.
Conclusion
Two or three whole azurescens mushrooms are enough for a so-called heroic dose. This means you’ll be at the mercy of the gods for four to six hours, unable to distinguish reality from what you see during the trip. A square meter of mushrooms in the garden can be a stable source of regular psychedelic trips.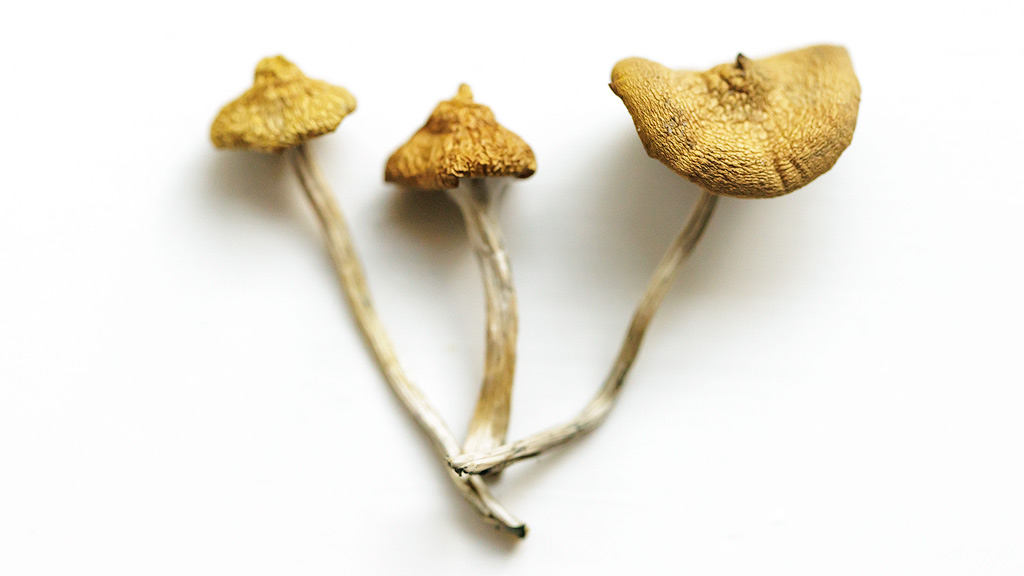
Three large, dried azurescens mushrooms: enough to launch you to the other side of the universe.
Depending on how moist they are when you harvest them and how well you dry them, these mushrooms lose about 8 to 10 times their weight in water during the drying process. After harvesting, place them on a dish lined with kitchen paper and cover the dish with a clean, dry tea towel. Drying takes about 4 days, but it’s not necessary. You can also eat them fresh, right after harvesting. Drying is only intended to preserve them for longer. Store them in a resealable bag, preferably with food-safe silica gel and an oxygen absorber, in a dark place. You can also store them in the refrigerator, but preferably in two resealable bags to avoid condensation. They’ll keep for a year this way. We don’t recommend freezing them.
In another article, we’ll write about the trip report. In the meantime, you can read about our psychedelic experiences here. Thank you for reading!
Sources:
- [1] Gotvaldová, K. et al. “Extensive Collection of Psychotropic Mushrooms with Determination of Their Tryptamine Alkaloids” International Journal of Molecular Sciences. 2022. doi: https://doi.org/10.3390/ijms232214068
- [2] Bradshaw, A.J. et al. DNA Authentication and Chemical Analysis of Psilocybe Mushrooms Reveal Widespread Misdeterminations in Fungaria and Inconsistencies in Metabolites. Applied and Environmental Microbiology. November 29, 2022. doi: https://doi.org/10.1128/aem.01498-22
- [3] Stamets, P. “Psilocybin Mushrooms of the World”. October 1, 1996. ISBN: 9780898158397.